Installing Git Cola on OSX
How to install Git Cola on macOS — the only Git GUI I've found that supports staging individual lines (not just hunks) for fine-grained commits.
There are tons of Git GUIs out there, ready to be installed with a couple of clicks. However, over the years I have always used Git Cola because it seems to be the only one providing one specific feature I use very often:
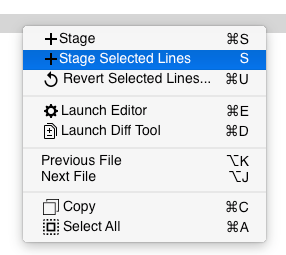
Many GUIs provide only something like this:
Hunks often are not small enough for my way of committing changes. I don’t like committing whole files or huge chunk of code. I prefer small commits: easy to review, easy to `git bisect` if something goes south, easy to `git cherry-pick` if necessary. I call them micro-commits and they are so radicated in my way of working that I simply cannot working without them.
Said that, Git Cola is a bit tricky to install on Mac OSX. Here are the necessary steps for you and future-me 🙂
Install MacPorts
Download and install MacPorts for El Capitan:
https://distfiles.macports.org/MacPorts/MacPorts-2.3.4-10.11-ElCapitan.pkg
Install PyQT
Once you have installed MacPorts, you need to install PyQT. Fire up a Terminal and run:
sudo port selfupdate
sudo port install py34-pyqt4
Install Git Cola
We got Python dependencies. We are almost there. A couple of commands more:
sudo pip install sphinx
brew install git-cola
git clone git://github.com/git-cola/git-cola.git && cd git-cola
make git-cola.app
rm -fr /Applications/git-cola.app && cp -r git-cola.app /Applications
Done. We can now run cola from any folder containing a Git repo and the GUI will fire up.
Tuning
Edit your ~/.bash_profile file and add the following line:
alias cola=’cola &’
This will start cola without locking the terminal.